Help Topics
Choosing Your Banner Size
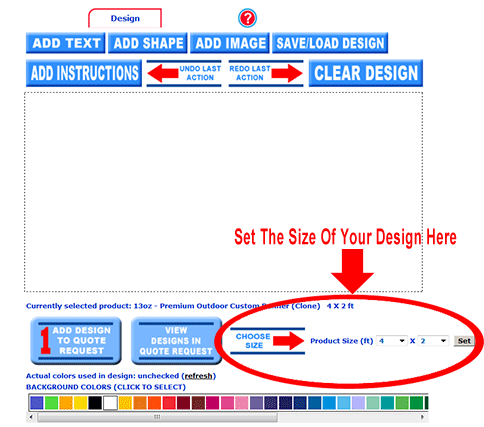
If you are designing a custom banner, custom yard sign, custom static cling, or custom vinyl graphics. You will need to specify the size of your design. You will find the controls for this at the bottom right hand section when in the designer. Custom Flags, and Sidewalk Sign inserts have predetermined sizes and won’t require you to specify a size.
Changing Background colors
It’s easy to move or resize objects within a design.
Resizing Objects within your design
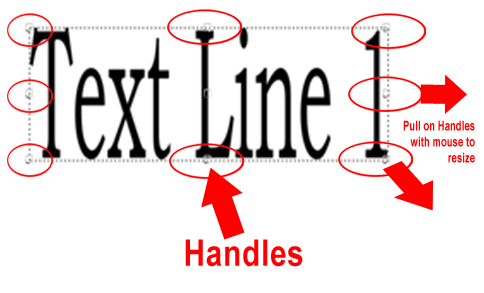
It’s easy to move or resize objects within a design. First click on the object you wish to resize, this will highlight the item with a dotted line with boxes in the corners, and midway each side. These are “handles” that you can grab onto to resize the object.
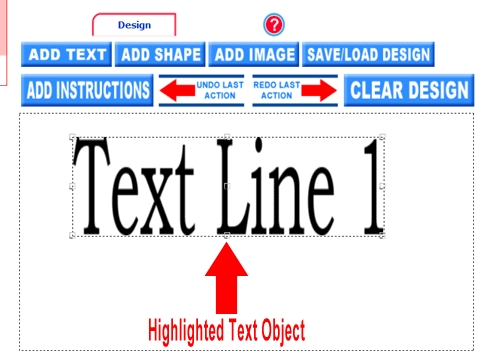
Using Editing Handles
To use the “Handles” left click and hold, then “pull” in the direction you would like to enlarge. To move after clicking on object hover until a four way cursor appears, right click and hold while moving.
Adding Text To Your Design
To add text to your design simply click on the blue “ADD TEXT” button. Doing this will insert a highlighted text object and open a text edit box in the upper left corner of the designer. For every line of text object you insert will have a edit box.
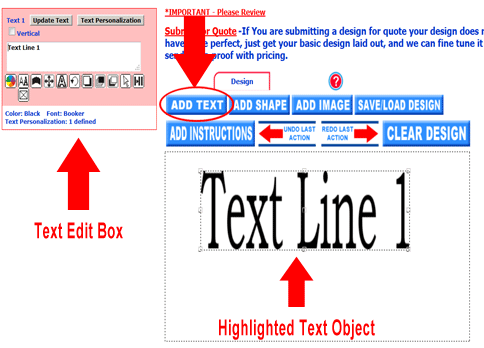
Adding more than one Text Object to your design
You can add as many text objects as your design needs. Each Text Object will have it’s own Text Edit Box.
Choosing A Font For Your Design
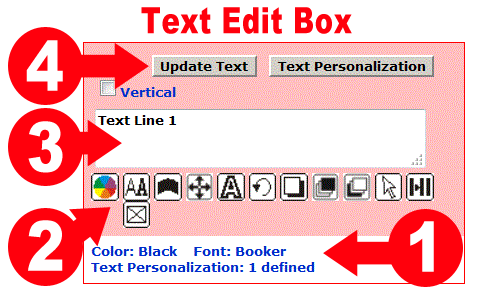
After using the “ADD TEXT” button, a Text Editing box appears.
1) At the bottom of the Editing Box is the information about the color and font of that Text Object.
2) There is a row buttons under the text box, the first button changes the color, the second button changes the font. SEE TEXT SPECIAL EFFECTS for an explanation for the rest of the buttons.
3) This is the text box where you can change the message of your text object.
4) It is very important that you update your text, with the “Update Text” button, to see the changes in your design.
Choosing A Font
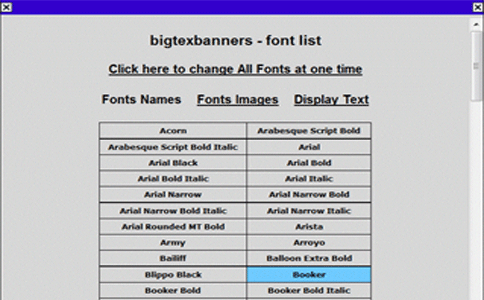
When you click the Font button a box will pop up with fonts for you to choose
Using The Text Effects Buttons
The first 2 buttons control Font & Font Color, as discussed in the Help Topic “Changing Fonts In Your Design”
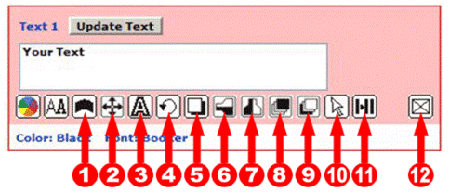
1) Distort Option– This button gives you options for changing the shape of your text, like arching it.
(2) Alignment And Sizing Options– This option allows you to align text, and dictate text size.
(3) Stroke Options– This option allows you to put a single or double colored outline around your text.
(4) Rotate Options– This option allows rotate your text.
(5) Shadow Options– This option allows to add a colored shadow to your text.
(6) Layer Up Option– This option allows you to bring a layer up, See Help Topic “Working With Layers”.
(7) Layer Down Option– Allows you to push a layer in back of another.
(8) Toggle Resize Option– Turns the handles used for resize, on/off.
(9) Duplicate Object– Allows you to duplicate the text line.
(10) Remove Object– Removes element from design.
Add Stock Clip Art To Your Design
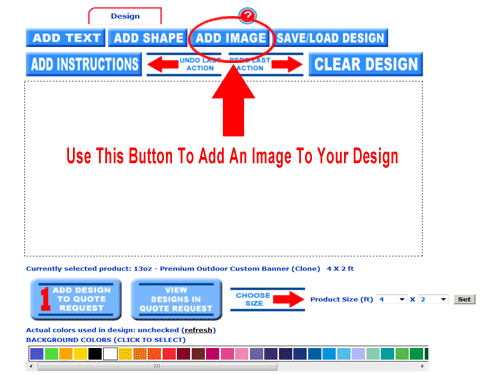
After clicking the “ADD IMAGE” button, a pop up window will appear with several options for adding artwork to your design. The default option shown will be adding a stock image, clicking the “Browse our clipart catalog” will bring you back to stock images from other options
Browsing Stock Images
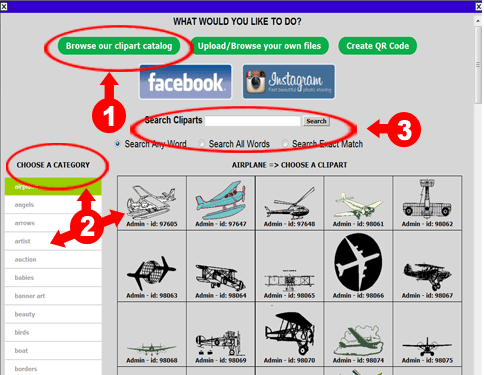
- Browse categories or search for clip art, double clicking the desired image will add it to your design, and close the clip art window.
- There are several Categories for you to choose clip art from.
- You can also use the search option to view available clip art
Add Custom Images To Your Design

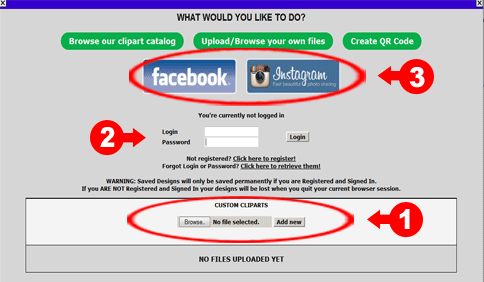
After clicking the “ADD IMAGE” button, a pop up window will appear with several options for adding artwork to your design. The default option shown will be adding a stock image, clicking the “Upload/Browse your own files” button that will take you to all the options for adding your custom images to your design
Browsing Stock Images
- Browse categories or search for clip art, double clicking the desired image will add it to your design, and close the clip art window.
- There are several Categories for you to choose clip art from.
- You can also use the search option to view available clip art
